
I hadn’t made bread for a few weeks and was starting to struggle with when to fit it into my schedule. I start to get a little cranky when I don’t make time for creativity (and tinkering with bread is a big one for me). Then a thought gently floated into my mind and suddenly there was no struggle. I would put bread dough together on Thursday evenings and bake it Friday morning. Fits perfectly into my schedule. So I’ve officially declared Friday my Fresh Bread Mornings!
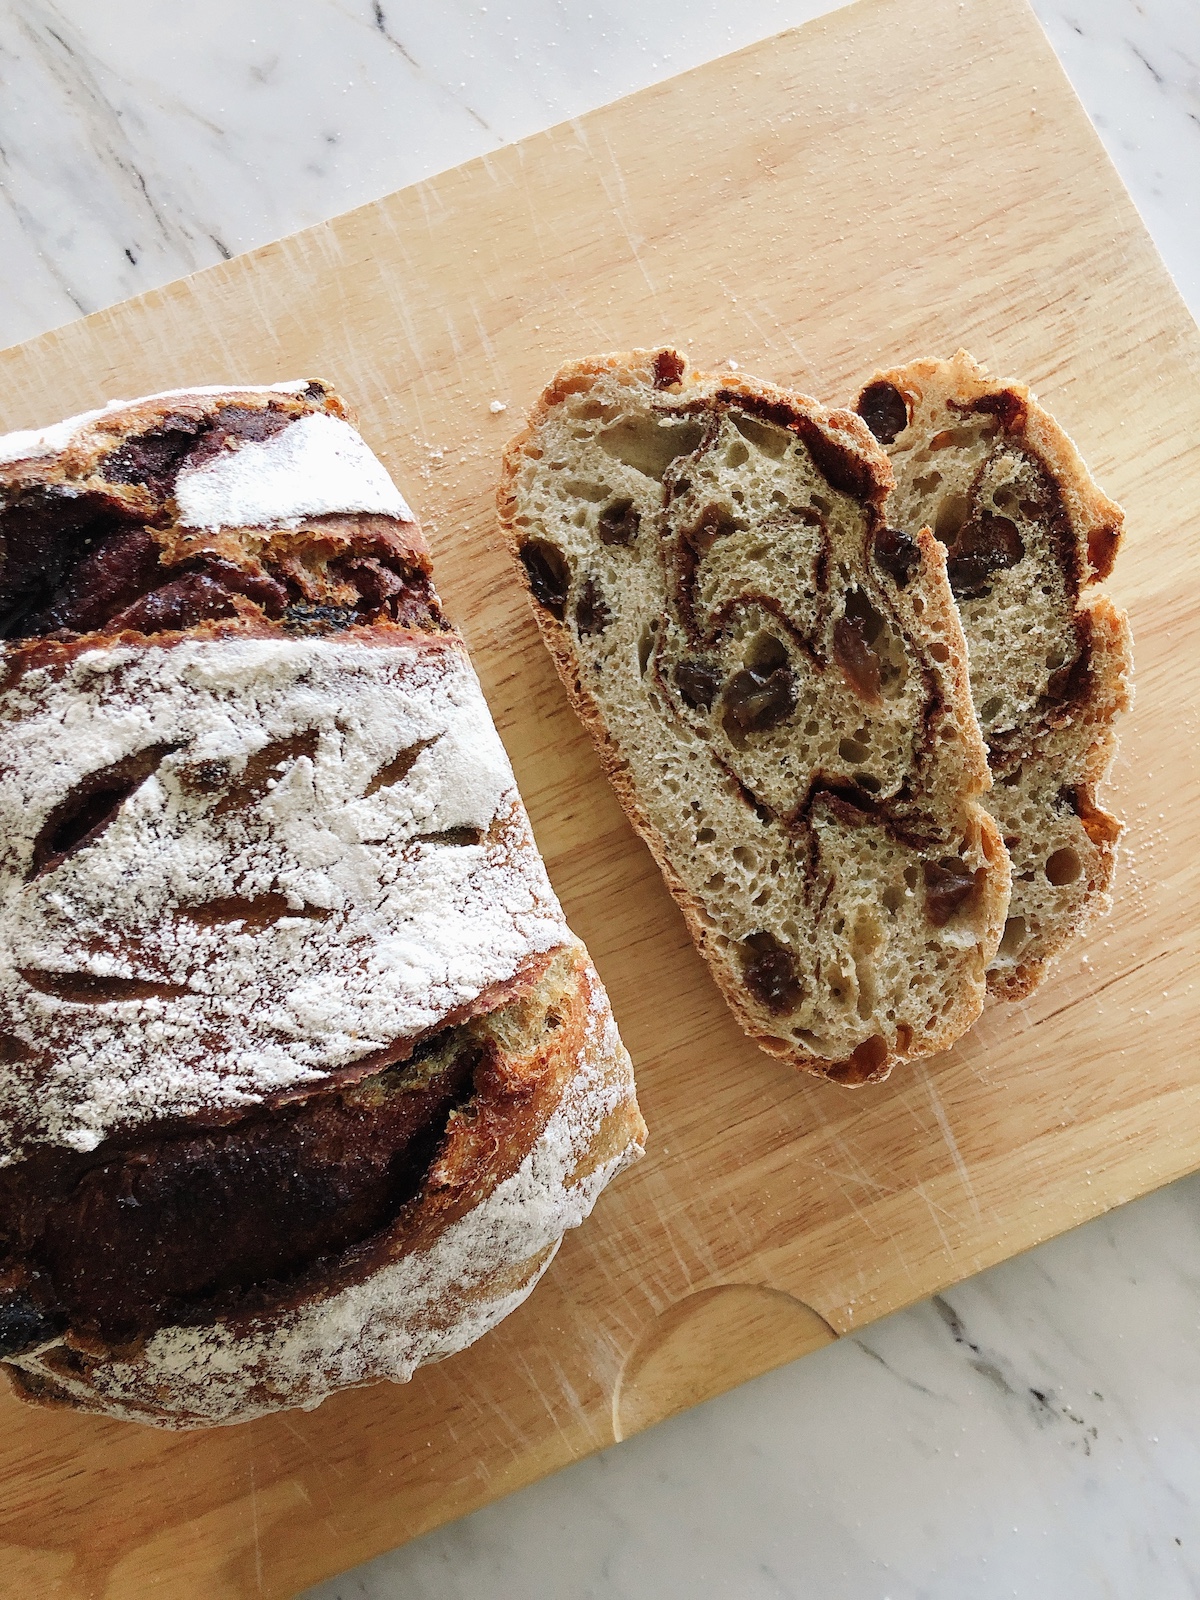
I wanted to make something a little different this week so on top of making a regular spelt bread I also turned that recipe into a cinnamon raisin bread! Not too sweet and sooooooooo amazing toasted with a little butter spread on top. Oh and your entire house will smell like this bread while its baking so that’s not a bad plus too.
A quick tip: If you want to increase the rise time beyond 8 hours put the dough together a couple of hours before bed and put the covered dough in the fridge. Remove the dough just before going to bed and place on the counter. The cold of the fridge will slow down the overnight rise.
Happy baking!
If you liked this recipe you are going to love these ones!
Seedy Spelt No Knead Bread
Sunflower Flax Seed No Knead Spelt Bread
Spelt Flour No Knead Bread
Updated April 8, 2022: I have updated the recipe including the method to allow for this bread to be placed in either a banneton basket or bowl for its second rise. I have also reduced the yeast in this loaf compared to all the others on my blog as the soaked raisins provided a significantly higher amount of sugar into the dough making it rise in about 4-5 hours if 1/4 tsp of yeast is used. This post was also long overdue for new pictures. 😉

Cinnamon Raisin No Knead Spelt Bread
Ingredients
- 100 g organic whole spelt flour fine grind if available
- 300 g organic all purpose, unbleached spelt flour (also called white spelt flour)
- 1 1/4 tsp sea salt
- 1/8 tsp instant yeast
- 300 ml room temperature water
- 100 g raisins soaked until plump and drained
- 2 tbsp dark brown sugar packed
- 1 tbsp ground cinnamon
Instructions
-
In a medium bowl, whisk together the flour, salt and yeast. Add the soaked and drained raisins and toss to coat them in the flour mixture. Add the water to the dry ingredients and mix the dough until it is completely incorporated and it sticks to your fingers. Cover the bowl with plastic wrap and let the dough rest for 20 minutes so the flour can absorb the water. After the rest, stretch and fold the dough by grabbing a piece of it from the outside edge then gently lift and fold that piece of dough over to the other side. Continue around the dough in a clock-wise fashion until the dough has tightened.
-
Cover the bowl again and let it sit at room temperature until the surface is dotted with bubbles and the dough has doubled in size (approximately 7-8 hours depending on your room temperature, see note 1). In a small bowl, mix together the brown sugar and cinnamon. Set aside.
-
When the first rise is complete, place your heavy cast iron pot and lid into the oven and pre-heat the oven to 475 degrees F. Position the rack in the lower third of the oven. While you are waiting, lightly flour a banneton basket or crumple a square piece of parchment paper, flatten it out again and line a medium sized bowl with it. Use your fist to push the paper down into the bowl and your other hand to smooth the creases of the paper around the inside and top edge of the bowl.
-
Generously dust a work surface with flour. Use a rubber spatula to scrape the dough out of the bowl in one piece. Using lightly floured hands gently pat the dough out into a rectangle approximately 7" wide by 13" long. Sprinkle the cinnamon/brown sugar mixture evenly over the dough leaving about an inch of dough around the edges bare. Roll up the dough gently from one short end to the other and continue rolling until the seam is facing up. Turn the log towards you and then roll up the dough gently from one short end to the other again.
-
With lightly floured hands, lift the dough and place it seam side up in the banneton basket or seam side down in the parchment lined bowl. Cover and place on the counter next to the stove for 20 minutes for the second rise. To test if the dough is ready, press, do not poke, the tip of one floured finger quickly and lightly, about half an inch, slightly off center, into the crown of the dough. If the indentation remains but springs back slightly, the dough is ready for the oven. If the dent fills in, give the dough another 5-10 minutes to rise and re-test.
-
Remove the pot from the oven and remove the lid.
-
If using a banneton basket, place a square piece of parchment paper on the counter and gently flip the dough on to it. Make shallow scores on the dough using a lame (or use a sharp pair of scissors to make 3-4 shallow cuts at a 45 degree angle along the center line of the dough) to assist in "oven spring". Lift the dough by holding the corners of the parchment paper and lower it into the pot.
-
If using a bowl, first lift the dough out of the bowl by holding all corners of the parchment paper and lower it into the pot. Then use a lame and make shallow scores on the dough (or use a sharp pair of scissors to make 3-4 shallow cuts at a 45 degree angle along the center line of the dough) to assist in "oven spring".
-
Cover the pot with the lid and put it back into the oven. Reduce the heat to 450 degrees F and bake for 30 minutes.
-
After 30 minutes, remove the lid and continue baking for another 10 minutes until the bread is a lovely chestnut brown. Remove from the oven, carefully lift the bread out of the hot pot and place it on a rack to cool thoroughly. If you have an instant read thermometer, the bread is done when the internal temperature is 190-200 degrees F.
Recipe Notes
- I am assuming a room temperature of 21 degrees C here. If your room temperature is higher your dough will take less time to rise, if you room temperature is lower your dough will take more time to rise. At this point you can also place the covered dough in the fridge to slow down the fermentation process. Bring the dough back to room temperature and ensure it has doubled in size and the surface is dotted with bubble before continuing.
- Unless you will consume all the bread within 2-3 days, cut it in half after it has completely cooled and store one half in the freezer. When you are ready for another half loaf, use your hands to moisten the entire outside with water and place in pre-heated 350F oven. Bake for 8 minutes or until the crust is hard to the touch, remove and let it finish thawing in the center. It will taste like freshly baked bread!

Hi Sophie!
Your blog is wonderful, and your recipes look amazing! I’ve been experimenting lately using Kamut flour (Anita’s Organic Mill is my go-to). Baking with Spelt has been on my list for a while. Now that I’ve come across your recipe’s, I’ll be buying it tonight and making bread with it asap!
I noticed in your bread recipes, you use a cast iron pot. I’m not familiar with them, do you have any tips / suggestions / things to keep in mind while using one for the first time?
Thanks!
Hi Melissa, thank you so much! Couple of tips for cast iron pots: buy them when they are on sale. Canadian Tire regularly puts them on sale for 70% off, otherwise they are pretty pricey. Make sure you have a good set of pot holders, I prefer silicone ones because the pots get smokin’ hot and the silicone can withstand the heat a lot longer than cloth pot holders. Oh and if you wash the cast iron make sure to use little to no soap (and dry them right away) or don’t wash them at all. I usually just wipe my out with a damp cloth to get the crumbs out (when they are cool!) and store them away until the next bread making adventure. 🙂
Just make sure you do not buy enameled cast iron for this; the are not meant to be heated empty at such a high temperature and for so long – they are low and slow cookware! Make sure to purchase seasoned (without the enamel) cast iron and you’re good to go!
Hi Caroline, thanks for the suggestion! Have you had trouble with the enameled cast iron dutch ovens? I ask because I have been using Lagostina ones that are enameled for years now to bake these bread recipes with no troubles.
Thanks for the recipe, this is amazing bread—- I make this bread regularly. I make a double batch bake in dutch oven and EH bread cloche, both turn out perfect every time. I often experiment with ratio of white/spelt flour with no issues.
Awww thanks so much Kim, that just made my day! 🙂
Hi Sophie. A friend recommended your website. You’re making some great stuff. I was wondering if you have ever used a starter culture for this or any other of your bread recipes?
Hi Danny, thank you so much! I have a couple newer bread recipes on the blog that use a sourdough starter:
No Knead Spelt Sourdough Bread: http://accidentalartisan.ca/no-knead-spelt-sourdough-bread/
Whole Grain Rye Sourdough Bread: http://accidentalartisan.ca/whole-grain-rye-sourdough-bread/
Happy baking!